

Before getting to today’s recipe, please allow me to thank you …
After last week’s post I received so many comments, messages and emails and I am truly at a loss for words. The kindness, concern and compassion that you have all showed was heartwarming and I deeply appreciate it. I am fine. I know so many of you were concerned that I sounded depressed or worse yet, desperate but I really wasn’t. I was just venting and I really appreciate the fact that you listened. Thank you.
To prove to you all that I am doing well and am back to my usual silver lining kind of girl, today I’ll be sharing some pictures of my favorite season here in the UAE. To be honest, I have a hard time labelling this as fall! (technically we are in the Northern hemisphere and it is fall) but today is the first day that the temperature dropped from the 30s C to 29 and as you’ll see in the pictures, trees are in bloom, flowers are everywhere and we occasionally get the beautiful cloudy skies that I am so fond of! It is anything but fall !
Regardless, I do hope you’ll enjoy this little peak into RAK( ras al khaima, UAE)

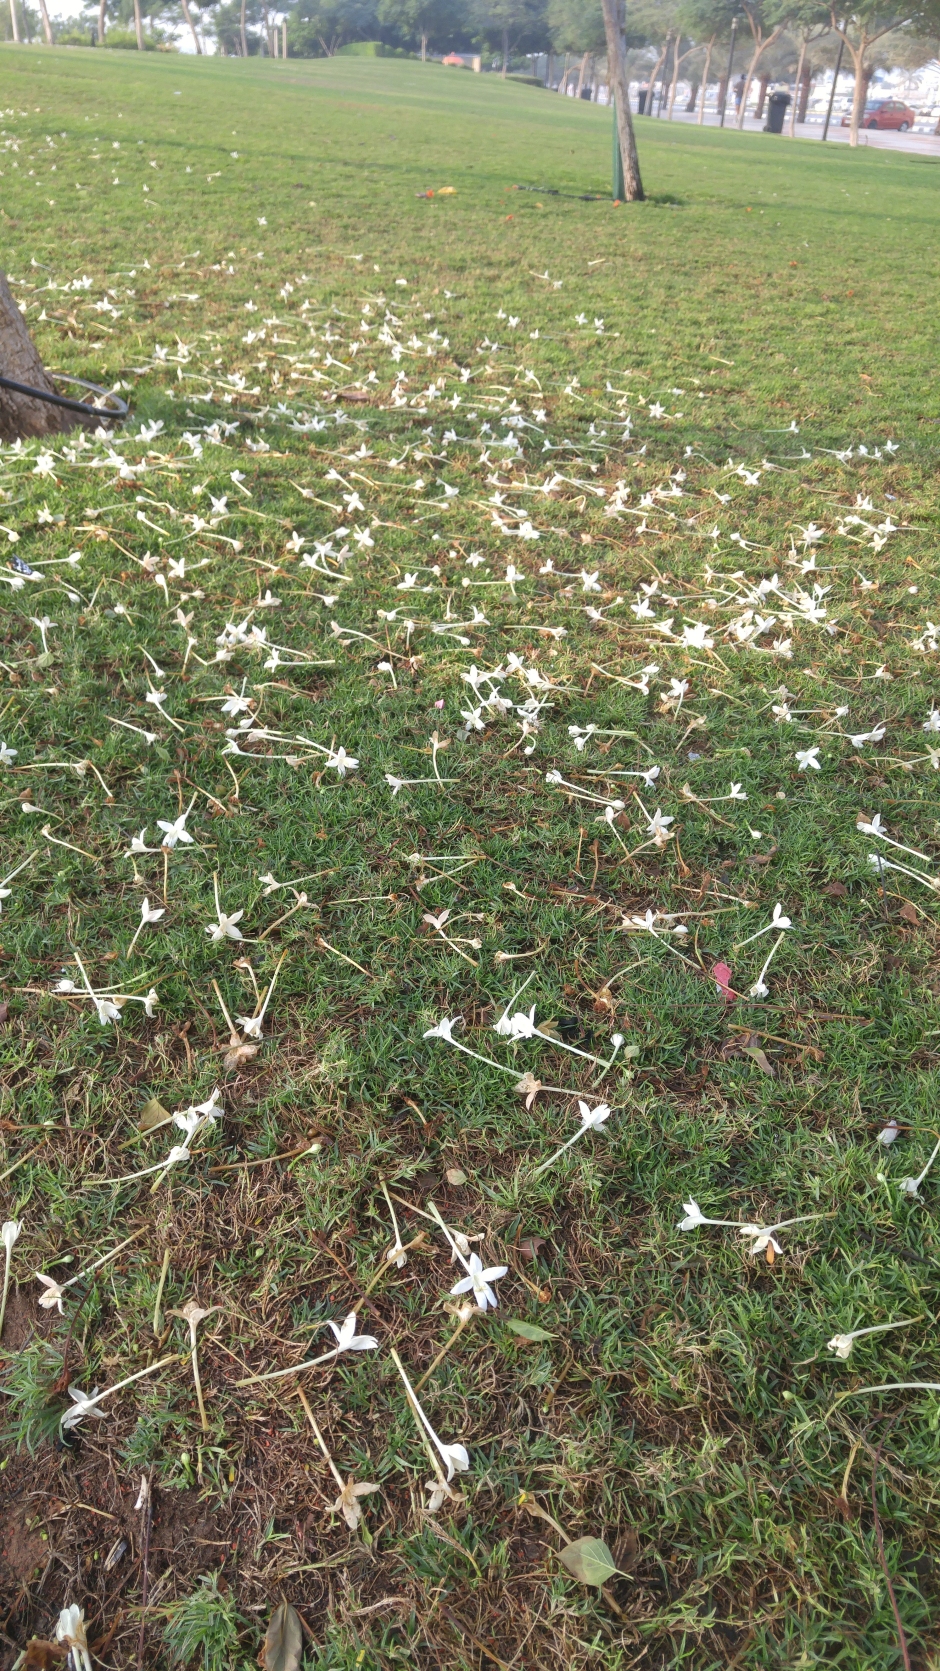
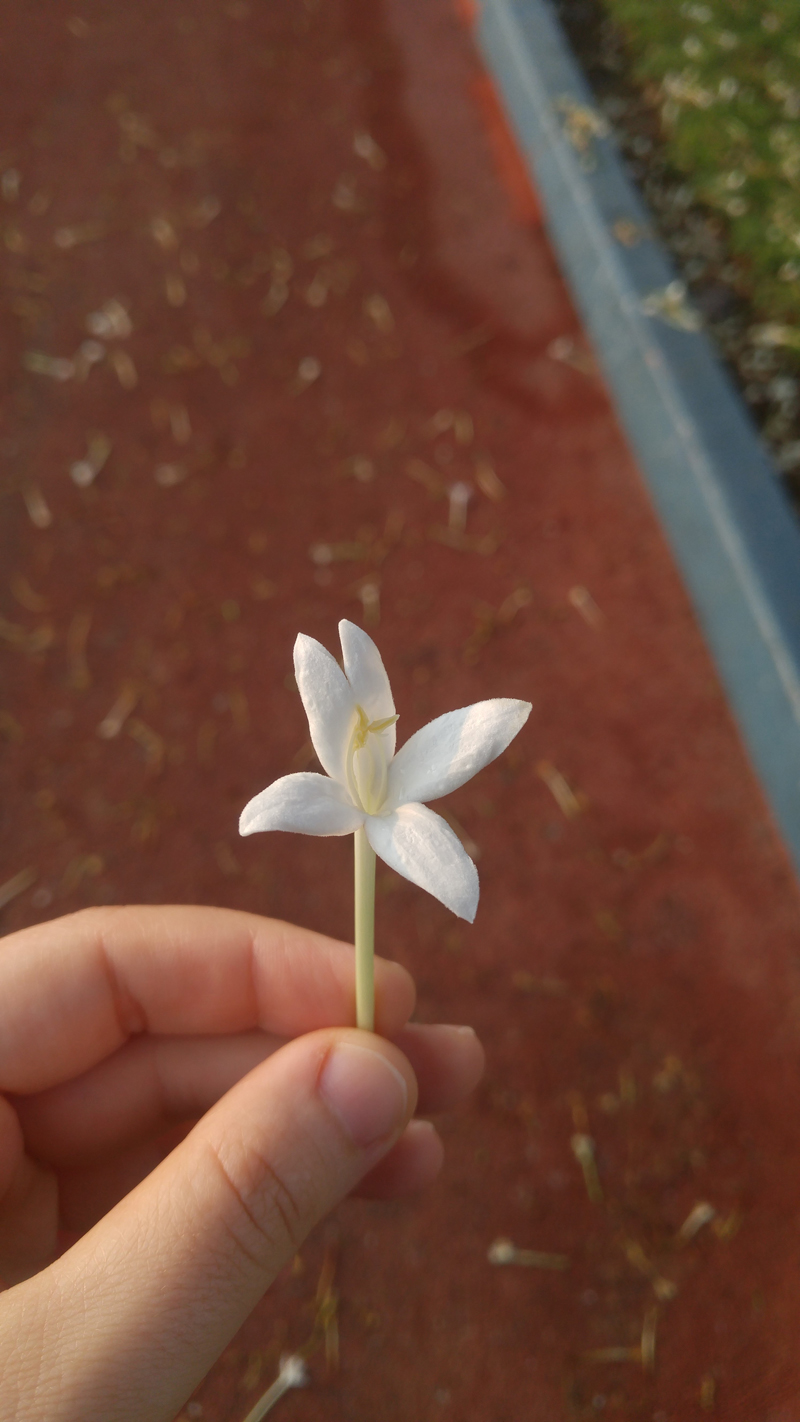
These little flowers come from the trees you see in the picture. They bloom in November and smell a little like jasmines. They only last for a few of weeks but I love every minute of that time.


I love watching the sun rise every morning. As the temperatures go down, the humidity goes down too and I can actually see the mountains!
These two pictures were just a few minutes apart.It was enchanting to watch the gradual change in colors


To explain what I mean by “I can actually see the mountains”, check out this picture of the same view you see above.For a good part of the year it is so humid that the mountains completely disappear..

Now on to today’s recipe.
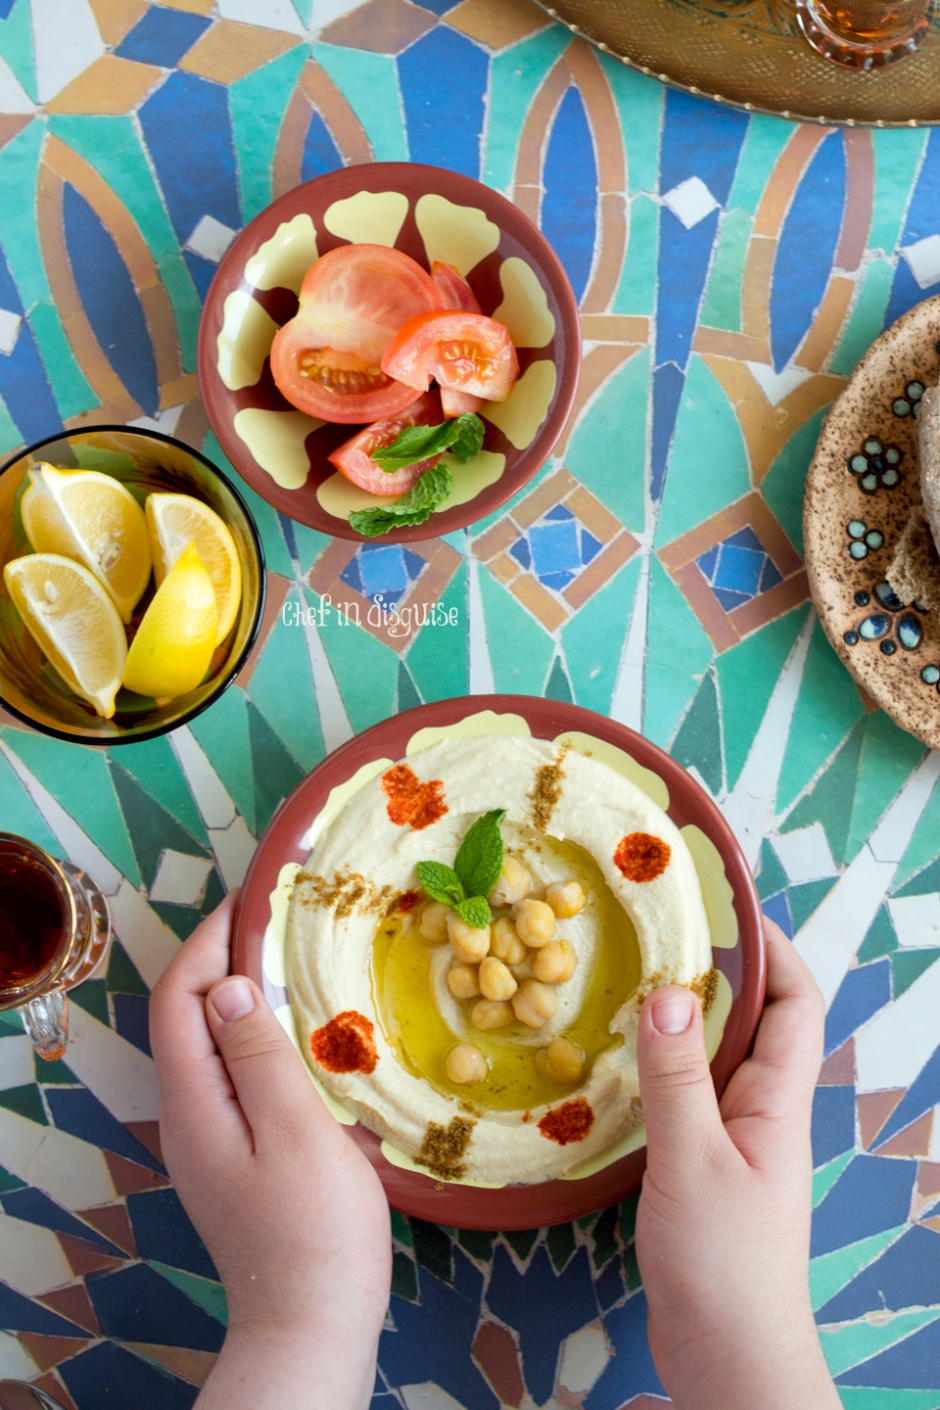
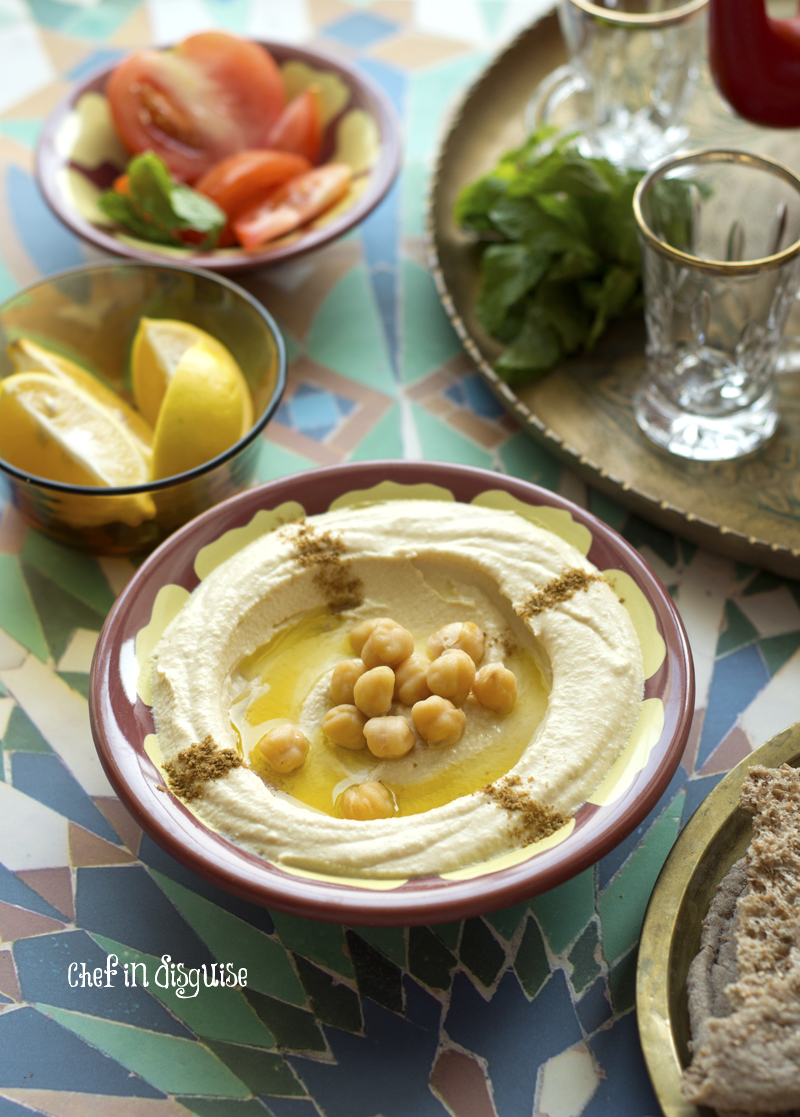
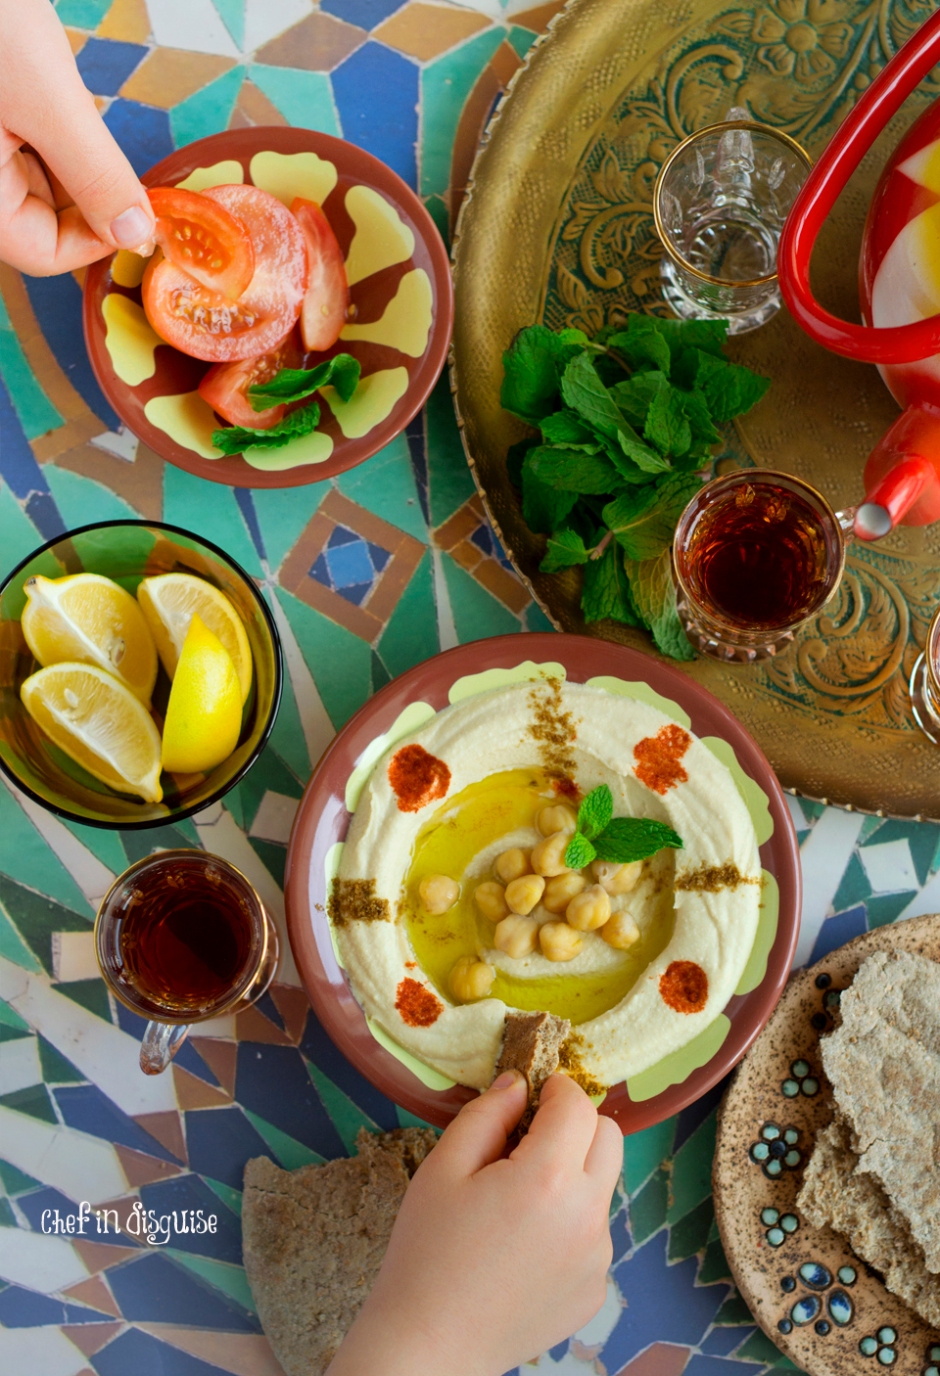
I have received so many requests for a basic hummus recipe over the years and I am really sorry it took so long for me to finally post my recipe for homemade hummus.
Making hummus at home is really simple and easy. It requires very few ingredients but as is the case with all simple recipes, the quality of those ingredients is the key to getting the best possible result. I’ll break this down for you and discuss them one by one:
Chickpeas: Yes, you can use canned chickpeas and they will give you pretty decent results but if you want to make the best possible homemade hummus, I would cook my own chickpeas at home. Don’t be intimidated, I know it is an extra step but as you’ll see in the recipe below it is so simple and requires very little active working time. Added to that, when you cook your own chickpeas, you can cook them till they are slightly overcooked and soft, that helps in giving you super smooth hummus. I always find canned chickpeas to be a tad too firm and that is one of the reasons why hummus made with canned chickpeas can be a little gritty.
Tahini: the quality of the tahini is really important in determining the final taste and texture of your hummus, so invest in some good quality tahini and you will love the result
Olive oil: So many recipes out there don’t use olive oil, I love the earthy tones it adds to hummus. I know that you might think that tahini has enough oil and it does but the small amount of olive oil adds a different dimension to the hummus and a certain depth that you just have to try. Added to that, it helps in making the hummus smooth
Yogurt: The yogurt is used here to add a little creamy tang to the hummus, so use greek yogurt if possible and the result would be even better if your yogurt is a few days old as yogurt becomes more tangy and sour with time and that tanginess is what we’re after. As is the case with olive oil, yogurt also helps in making hummus smooth
Lemon juice: Fresh lemon juice and fresh only. Please don’t use anything out of a bottle
To cumin or not to cumin: That is entirely up to you. I love hummus without cumin, my kids love it with cumin. Try it both ways and decide which one appeals to your taste
How to get the perfect smooth hummus: There are a few things you can do to get your hummus to be super smooth
- Add olive oil
- Add yogurt
- Whisk or blend the tahini with the lemon juice until it becomes thick and pale, add the yogurt and olive oil, whisk or blend again then add the chickpeas and salt.
- Use a high power blender like a nutribullet
- To peel or not to peel: I have tried this recipe with peeled chickpeas and unpeeled chickpeas and I can honestly tell you that peeling the chickpeas made very little difference. I personally don’t peel the chickpeas and get super smooth hummus every time
Additional flavors: I know that the internet is full of hummus recipes that are every possible color and flavor and I am not against that but before venturing into all those colors and flavors, give the basic authentic hummus a try. This is the way that hummus is made and served throughout the middle east and for good reason.
Homemade basic hummus
2 cups cooked chickpeas
1/4 cup tahini sauce
3 to 4 tablespoons lemon juice
1 tablespoon greek yogurt
1 tablespoon olive oil
1/2 clove garlic minced
1/2 teaspoon salt
If you use chickpeas that you have cooked at home, rise them first and drain them well to get rid of the baking soda flavor
In a high power blender place all the ingredients and process for 1-3 minutes. You may have to stop and scrape the sides a couple of times
Notes:
The consistency of the hummus will differ slightly with the type of tahini that you use, if it comes out a little on the thick side, add another tablespoon of greek yogurt and blend again
You can add 1/4 teaspoon of cumin to the above ingredients to flavor the hummus if you like
Stored in an airtight container in the fridge this hummus will last for 5-7 days.
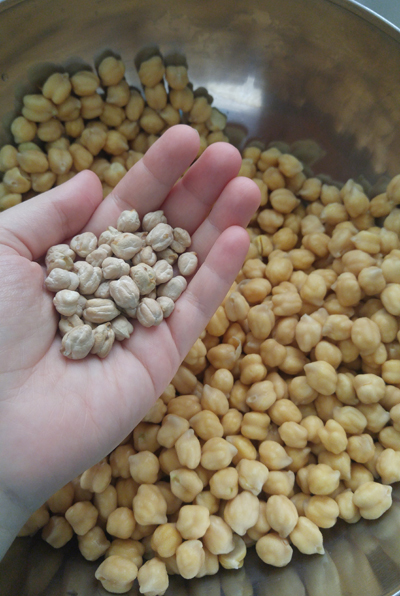
How to cook chickpeas
You’ll need
Dried chickpeas (I usually use 500 to 800 gm because my kids love eating chickpeas as a snack but you can use 2 cups only to yield the amount required for this recipe)
Baking soda
Water
- The night before place the dried chickpeas in a bowl, rinse them 2-3 times and discard the water
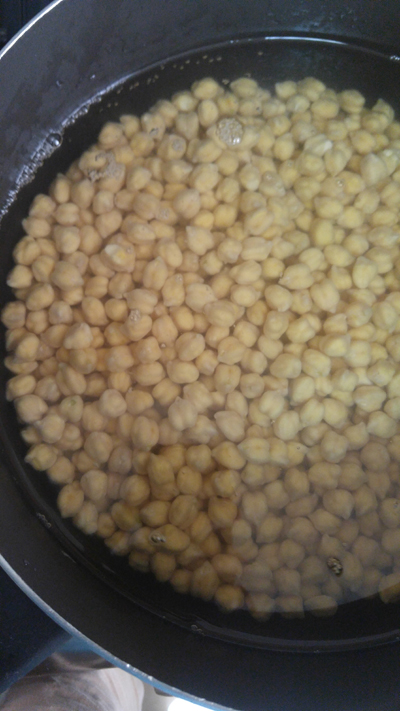
- fill the bowl with water making sure that the level of the water is at least 5-7 cm above the level of the chickpeas
- Allow to soak overnight. The chickpeas will almost double in size
- the next morning discard the water and rinse the chickpeas again
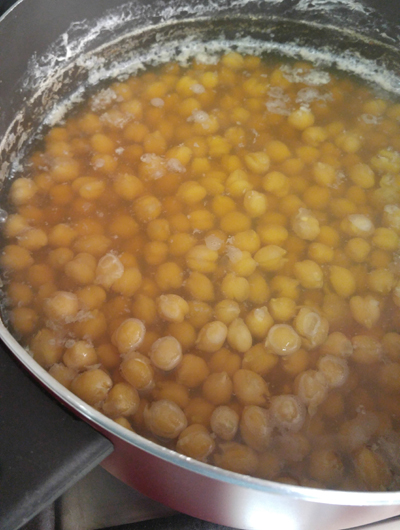
- Place the chickpeas in a pot and add enough water to submerge them completely. You need the level of the water to be 10 cm above the level of the chickpeas
- Bring the water to a boil over medium heat, you’ll notice that foam appears on the surface of the water, remove it with a slotted spoon
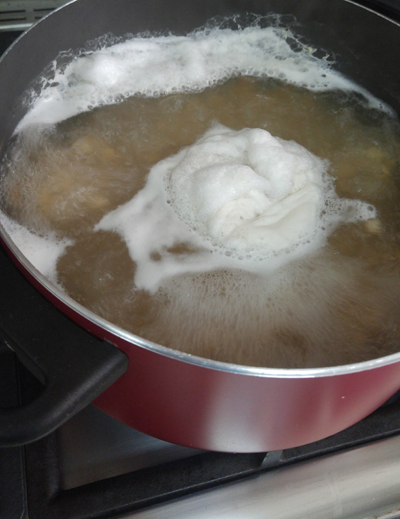
- Add 1 teaspoon of baking soda (per 500 gm of dried chickpeas) to the water, it will fizz foam and bubble

- cook the chickpeas for an additional 20 to 30 minutes or until you can mash one with your fingers easily (the exact duration required will differ with the type of chickpeas used, some types require longer to cook that others)
- Take the chickpeas off the heat and allow them to cool completely
من اكثر الوصفات التي طلبت مني عبر السنوات هي وصفه الحمص المحضر من الصفر منزليا. اتمنى ان تنال الوصفة اعجابكم
المقادير:
2 كوب من حبات الحمص المطهوه سابقا
ربع كوب طحينة
3-4 ملاعق كبيرة من عصير الليمون
1 ملعقة طعام من اللبن الزبادي
1 ملعقة طعام من زيت الزيتون
1/2 سن ثوم مفروم
1/2 ملعقة صغيرة ملح
نغسل حبات الحمص و نصفيها جيدا من الماء للتخلص من طعم صودا الخبز
نضع كل المكونات في محضرة الطعام و نشغلها لمده 2 الى 3 دقائق
الملاحظات:
الطحينة: جودة الطحينة مهمة جدا في تحديد قوام الحمص النهائي و طعمه ، لذلك فاختياركم لنوع جيد من الطحينه سيعطي نتيجة افضل
زيت الزيتون: اضافة زيت الزيتون لها وظيفتان: جعل الحمص ناعما بدون حبيبات او تكتلات كما و انها ستضيف غنى لطعم الحمص
الزبادي: كلما كان اللبن الذي تستخدمونه اكثر حموضه كلما اعطى طعما افضل للحمص. وجود اللبن او الزبادي في الوصفه هو للمساعده على اعطاء الحمص قوام كريمي ناعم بالاضافه الى اعطائه نكهه محببه
عصير الليمون: من الضروري استخدام عصير الليمون الطازج للحصول على افضل النتائج…رجاء لا تستخدموا عصير الليمون المعلب الذي يباع في زجاجات في الاسواق
اضافة الكمون: هو امر متروك لكم. أنا أحب الحمص دون الكمون وأطفالي يحبونه مع الكمون.جربوا الوصفه مره بالكمون و اخرى بدونه و قرروا ايهما تفضلون
من اكثر المشاكل التي يواجهها الناس عندما يحضرون الحمص في المنزل لاول مره هي قوام الحمص، اليكم بعض النصائح من خبرتي التي تساعدكم على الحصول على حمص ذو قوام ناعم:
1.طهو حبات الحمص حتى تصبح طرية جدا
2.إضافة زيت الزيتون
3.إضافة اللبن
4.خفق الطحينة مع عصير الليمون قبل اضافه باقي المكونات. ستلاحظون ان قوام الطحينه سيصبح اثقل و لونها سيصبح شاحبا، إضيفوا الزبادي وزيت الزيتون ثم اخفقوا مره اخرى و في النهاية اضيفوا الحمص والملح.
5. استخدام خلاط او محضر طعام ذو محرك قوي سيساعدكم على الحصول على حمص ذو قوام ناعم
6.تقشير الحمص: تقترح العديد من الوصفات ازاله قشور حبات الحمص للحصول على قوام افضل ..لقد جربت هذه الوصفة مع الحمص المقشور والحمص غير المقشور واستطيع ان اقول لكم بصراحة أن تقشير الحمص احدث فرقا بسيطا جدا لا يستحق المجهود المبذول. أنا شخصيا لا قشر حبات الحمص و احصل على النتيجه التي ترونها في الصور..حمص ناعم القوام و لذيذ
قوام الحمص سيختلف قليلا باختلاف نوع الطحينة التي تستخدمونها، إذا وجدتم ان قوام الحمص سميك، أضيفوا ملعقة كبيرة أخرى من اللبن و اخلطوا مرة اخرى
يمكنك إضافة 1/4 ملعقة صغيرة من الكمون إلى المكونات السابقة لاضافة نكهة الى الحمص إذا كنتم تحبون ذلك
يمكنكم حفظ الحمص في الثلاجه لمده 5 الى 7 ايام في وعاء محكم
كيفية طبخ الحمص الجاف او اليابس
ستحتاجون الى
الحمص المجفف (عادة ما استخدم 500-800 جرام لأن اطفالي يحبون أكل الحمص كوجبة خفيفة ولكن يمكنكم استخدام 2 كوب فقط للحصول على كمية الحمص المطلوب لهذه الوصفة)
صودا الخبز
ماء
في الليلة السابقه نقوم بوضع الحمص المجفف في وعاء، ونغسله 2-3 مرات
نملأ الوعاء بالماء مع التأكد بأن مستوى المياه لا يقل عن 5-7 سم فوق مستوى الحمص
نترك الحمص في الماء لمدة 8 ساعات على الاقل. ستلاحظون ان الحمص سيتضاعف تقريبا في حجم
في صباح اليوم التالي نتخلص من الماء ونغسل الحمص مرة أخرى
نضع الحمص في طنجرة ونضيف كمية كافية من الماء لغمر الحمص تماما. يفضل ان يكون مستوى الماء 10 سم فوق مستوى الحمص
نضع الطنجره على النار حتى يغلي الماء ستلاحظون ظهور رغوة على سطح الماء، قوموا بازالتها و تخلصوا منها
بعد ازاله الرغوه نضيف 1 ملعقة صغيرة من صودا الخبز (لكل 500 غرام من الحمص المجفف) إلى الماء، ستفور المياه بمجرد اضافه كربونات الصودا ثم ستهدأ الفقاعات
بعد اضافه الصودا نستمر في طبخ الحمص من 20 إلى 30 دقيقة أو حتى يصل الحمص لدرجة يمكنكم هرس حبه من الحمص بسهوله اذا ضغطوا عليها باصابعكم (المدة الدقيقة اللازمة سوف تختلف مع نوع من الحمص المستخدمة، وبعض أنواع تتطلب وقتا أطول من انواع اخرى)
نرفع الطنجره عن النار و نتركها لتبرد تماما
