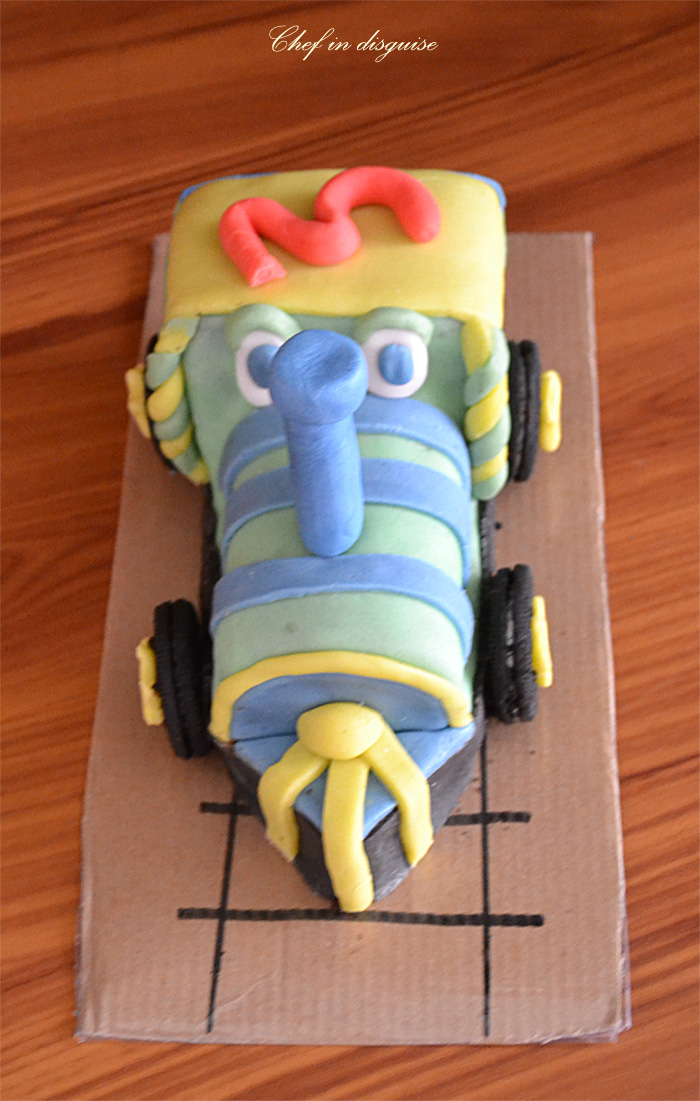
This birthday circus train cake is long over due, you see I made this cake for my son’s third birthday. He is currently very fond of trains of all shapes and kinds starting with Thomas the tank engine to this circus train which was inspired by the fact that even with this new love for trains, my little boy still loves elephants and there had to be a way to incorporate an elephant into the train cake theme.
I had a great time making this cake with the kids. I only make fondant cake twice a year in June and November for my kids’ birthdays. It can be time consuming and a little messy but the kids and I really enjoy the whole process. From exploring ideas to planning the cake on paper to the actual making of the cake.
Each time we make one of these cakes something terribly messy and funny happens (this time my son spilled the blue food coloring bottle all over my feet and the floor and I had blue feet for weeks).I question my sanity half a dozen time with each cake but when all is done, the look on my kids faces, their joy and I hope the memories we make together are more than worth it
The train was made up of 3 carts, the engine, the animal cart and the clown cart. It is entirely edible except for a couple of toothpicks holding the seal, horse and giraffe.
The cake:
I used my go to butter cake recipe for the vanilla cake and made another using the same recipe but reduced the flour by 3 tablespoons and replaced them with coco powder. I added 1/2 teaspoon of cinnamon and 1/4 teaspoon of instant coffee to flavor the chocolate cake. I divided the batter making one vanilla cake using 2/3 of the vanilla batter, one chocolate cake from 2/3 of the chocolate batter and a marbled cake using the remaining one third of each of the two batters
The Fondant:
I usually use Marshmallow fondant, or this Fonfant recipe if I want something with more flavor. This time I wanted a fondant that would hold its shape enough to make the figures so I tried a new recipe I got from my dear friend Rafiqa and it was a charm. It requires a few more ingredients but the result is well worth the trouble. The fondant was easier to work with, held its shape beautifully.
1 kg icing sugar
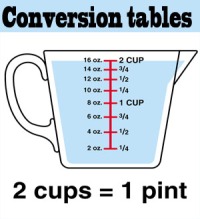
75 ml water (1/4 cup and 1 tablespoon)
1 1/2 tablespoons gelatine
20 ml glycerine (1 1/2 tablespoons)
30 grams vegetable shortening (never use butter )
150 ml light corn syrup (2/3 cup)
Put the water into a pan, sprinkle the gelatine on top of it and leave it to bloom for a few minutes
Add the glycerine, shortening and syrup and heat gently till the gelatine dissolves, don’t allow the mix to boil
Place the icing sugar in a mixing bowl and make a well in the center, pour the liquid mix into it and mix till completely combined
You will think that it is too soft, resist the temptation to add sugar.
Pour it into a ziplock bag or a container and cover well
Leave for 24 hours at room temperature.
when you are ready to use it, take it out and knead it, as you can see from the picture it firms up while it rests. If you still feel it is too soft, add some icing sugar and knead till you get to the consistency you like
The ganache:
I have mentioned before that I find using butter cream under fondant makes the end product too sweet for my taste. Chocolate ganache adds a beautiful chocolate note to the cake, is not too sweet and if you ask me , it is easier to get smooth . You can find the recipe and step by step to making it here
The fillings:
With three cakes it was fun to experiment with fillings. The engine was a chocolate cake and it was filled with nutella. The animal cart was a vanilla cake and it was filled with fruit. The third cart was a marble cake and it was filled with buttercream as requisted by the kids
Buttercream icing
3 cups icing sugar
1 cup butter softened
2 teaspoon vanilla
2 tablespoons milk
In a food processor beat the butter untill it turns white or very light in colour
Add half the amount of the sugar and beat until combined
Add the milk and vanilla
Add the rest of the sugar gradually while beating
The time plan:
I made the cake over the course of 3 days and I thought I would share my time plan with you hoping that it would help you plan ahead if you decide to make a train cake
Day one:
Bake the cakes,make the fondant and the ganache or buttercream to cover your cake. Both the cake and the fondant are much easier to handle if allowed to rest over night. The cake becomes less crumbly which makes it easier to frost, just bake the cake, allow it to cool and wrap it in cling film and keep it in the fridge. The fondant and the ganache can be made up to a week in advance if you are tight on time
Day Two:
Carve the cake , fill it, cover it with ganache or butter cream then allow it to chill in the fridge for the cover to set.
Start on making the figures and the facings for the carts. (this step can actually be made up to a week or two ahead of time)
Day three
Cover the cake with fondant adding as many derails as you like.
Attach the figures. You are ready to party
Circus train birthday cake step by step
Make a vertical cut two thirds of the way horizontally and vertially. Don’t discard this piece
Cut two triangles from the front of the cake
 Use the piece you cut out in step one by cutting it in half and use it to raise the back of the train.
For the engine part I used a swissroll cake (store bought) and was considering using a smaller one for the funnel but then used fondant instead.
I then used nutella to stick all the parts together.
For the other carts I simply divided them into 3 layers and filled them .
Next I covered the cake with ganache (you can find a step by step to doing that here). You can use buttercream (you can find a step by step tutorial here)
Allow the ganache to set in the fridge
For the engine I covered the cake with green fondant, then added decorations with other colors. You can find a step by step tutorial on how to decorate a cake with fondant here.
The wheels were made of oreos and glued on with ganache
Making animal figures out of fondant
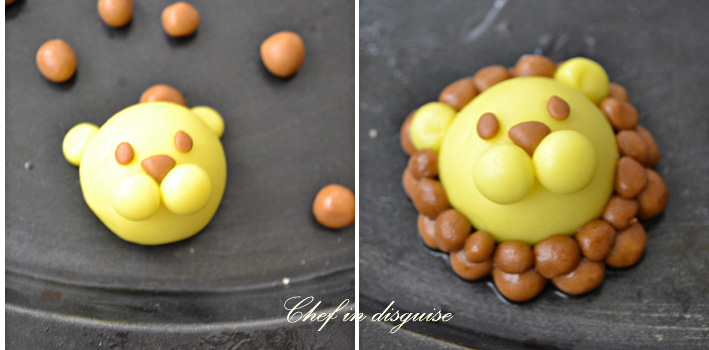
To make the lion :
The big ball makes the head, the two small ones make the mouth.
The ears are made of small balls that I spread out then rolled I then used a tooth pick to make holes for the ears and then I used a brush with some water to help the fondant stick together
The small brown balls make the eyes and the triangle makes the nose.
I used water to stick all the parts together
The hair was made of brown fondant balls
To make the giraffe:
I made a small oval shape for the head and an elongated oval for the neck . I used a tooth pick to attach the head to the neck
The ears were made the same way as I did with the lion and then two small horns were added with brown fondant
The spots were little balls of brown fondant that I spread out and used water to stick to the neck and face
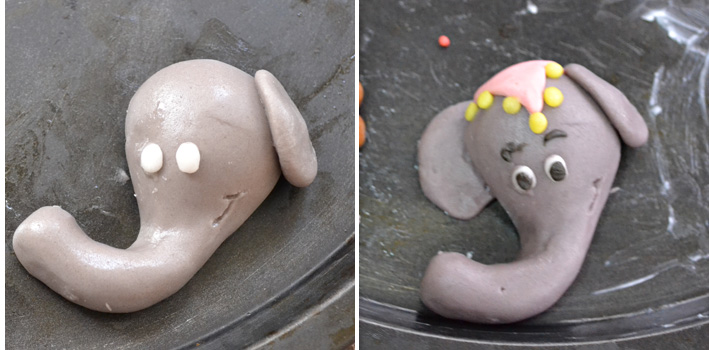
Elephant:
For the elephant I started with a big gray oval fondant ball and then rolled one end to form the trunk.
For the ears I used two balls , I flattened each ball and used it for ears
For the animal cart
After filling the cake, I removed a rectangle from the front of the cake (sorry I don’t have a picture for that)
I covered the cake with ganache, allowed it to set for a couple of hours and then covered it with red fondant.
I had made a frame for the cut part using red fondant the day before and allowed it to dry ober night, sadly the top broke when I was attaching it so I attached the top to the top of the cart. and then I arranged the animals in the window in the middle.
For the clown cart
I cut out two windows out of the front of the filled cake. Covered the cake in ganache and allowed it to set
The next day I covered it with blue fondant.
Again I had made the frame out of fondant I rolled the day before and cut into a triangle and cut out the windows and allowed it to dry.
I used water to stick it to the cake.I then stuck the clowns into the windows using fondant and a little water.
All the details you see were made with fondant
The seal was then fixed onto the top with a tooth pick
I hope You found this post helpful and if you have any questions I will be more than happy to help.
Coming next:
We will continue our trip to Petra in the next post, stay tuned 🙂


