Sorry for the absence but I have had a crazy weekend (as usual!). Work, exams, shopping, a deadline in a Photoshop course I’m taking …to name a few things! On the plus side mum asked me to make some cookies as a gift to her friend and as busy as things were I was thrilled! I love baking cookies!
I wanted to make something that tasted great but I also wanted it to look elegant. I wasn’t sure if she is a chocolate or vanilla person so I needed a cookie that is the best of both…I was on a mission and google came to the rescue…A search and a dozen clicks later I found my answer…
Checkerboard cookies.
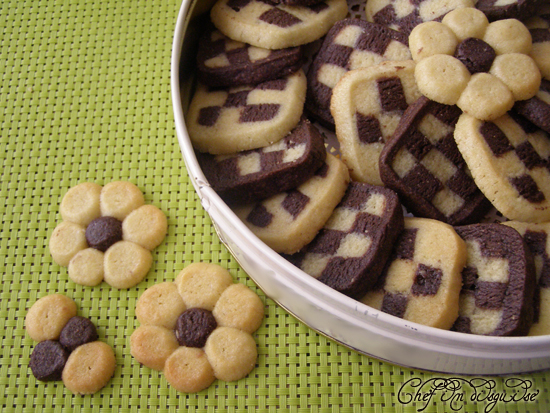
A blend of vanilla and chocolate dough formed into these amazing elegant little squares. The technique seemed intimidating at the first look but since I started this blog I have made a decision to keep challenging myself and pushing the limit. I joined the daring kitchen for that same reason and I’m having a blast but that is another story for another day 🙂
Back t0 my checkerboard cookies . I decided to divide the work, made the dough the first day,finished it the next morning. Once you put them in the oven your whole house will smell heavenly. That is the part I love the most about baking..The way it fills the house with a welcoming delicious scent. Once you taste these checkerboard cookies you will regret halving the recipe (I know I did!). They are rich and buttery, the hint of almonds in the chocolate adds a depth of flavor and the combination of vanilla and chocolate is just DELICIOUS.
The recipe comes from an amazing blog (baking obsession)that I have just discovered. I halved the recipe because this is my first time making these cookies but another patch is coming very soon 🙂
Checkerboard cookies…recipe from baking obsession
Ingredients:
5 1/3 cups all-purpose flour
1 tsp baking powder
1 tsp salt
1 lb (2 cups or 4 sticks) unsalted butter, at room temperature
2 cups granulated sugar
1 tbsp pure vanilla extract
2 large eggs, at room temperature
½ cup unsweetened cocoa powder
Preparation:
Sift 5 cups of the flour with the baking powder, and salt. Set aside.
In a large bowl, using an electric mixer, beat the butter and sugar together until light and fluffy.
Beat in the eggs, one at a time, then add the vanilla extract.
Add the flour mixture and mix to combine (I started with a wooden spoon then finished kneading with my hands).
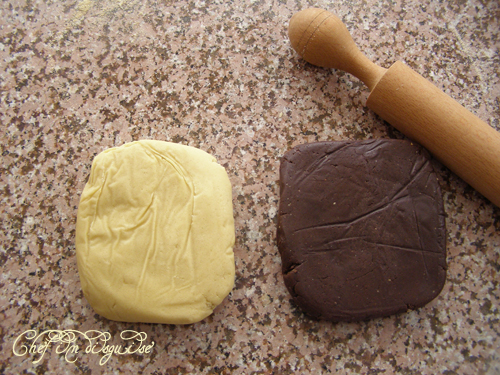
Divide the dough in half.
Knead ½ cup of cocoa into one of the two halfs (if your dough becomes tough or crumbly add one egg white)
If the white half of the dough is a little on the soft side, add the remaining 1/3 cup of flour
Form the dough into somewhat rectangular shape
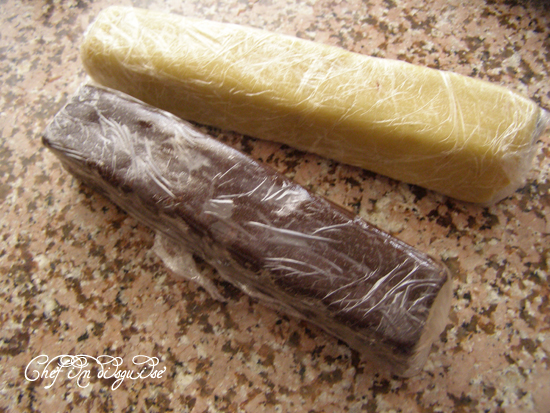
Wrap the dough in a plastic wrapper then put in the fridge for at least 15 minutes (You can leave it over night)
Roll out each of the chocolate and the vanilla dough into a rectangle with about 1 cm thickness.(make sure you do this on a floured surface using a floured rolling-pin)
Cut the each rectangle in half. (Wrap one half of the vanilla dough and one half of the chocolate dough with plastic wrap and put them back in the fridge)
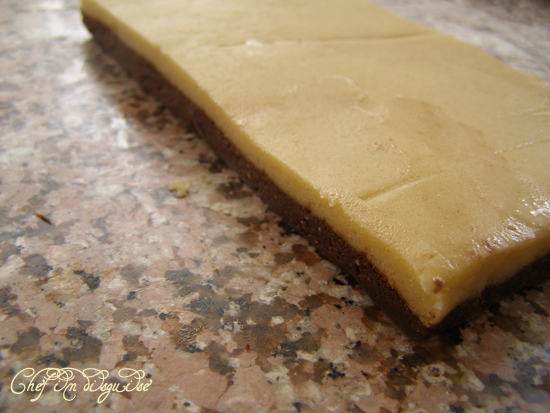
Brush the top of the remaining chocolate dough with water or egg white.
Place the remaining half of the vanilla dough on top of the chocolate dough.
Cut the black and white rectangle in half-length wise (you get two rectangles the same length as the one in the picture above with only half its width)
Brush the top of one of the two rectangles with egg white then place the other rectangle on top of it making sure you reverse the colors. The order of the layers should be chocolate then vanilla then chocolate then vanilla.
Wrap the 4 layered dough rectangle in plastic wrap and put it in the fridge for at least 15 minutes up to a day.
Using a very sharp knife or a pizza wheel cut your 4 layered rectangle into strips 1 cm wide.(I used a ruler to make sure I cut them straight).
Handling the strips delicately, brush one strip with egg-white then place another strip on top of it making sure you reverse the order of the colors. Then brush the top strip with egg white and place another strip on top of it
You could stop at 3 strips..I did 4 but I think next time I’d do 3 because the end result would look better with just 3
On the parchment paper or plastic wrap roll the remaining chocolate (or vanilla) dough (the one that was in the fridge) into a rectangle about 1/3-inch thick. (it would help to let it stand at room temperature for 15 minutes before rolling)
Place the checkerboard log into the center, long sides parallel, and with the aid of parchment, wrap the dough around the checkerboard log pressing firmly to adhere.
Roll the finished log from side to side to form sharp corners. Wrap in the parchment and/or plastic and refrigerate well. The best would be to leave the formed cookie log in the refrigerator overnight.
When ready to bake, center an oven rack and preheat the oven to 180 C.
Spray a baking sheet with oil
Using a very sharp knife, slice the cookie-dough log into less than 1cm thick slices.
Place on the prepared baking sheet leaving about 1 inch all way around them.
Bake the cookies, in batches, for about 12 minutes until firm and golden brown on the bottom. Don’t let them bake for too long, or the color contrast between the chocolate and vanilla dough will be lost.
Cool on the baking sheet on a rack for 15 minutes. Then transfer the cookies to the rack and cool completely.
I had some left over dough so I cut it into small pieces
Then I made these little flowers with them..My daughter was so excited when she saw them
5 و 1 / 3 كوب طحين لجميع الأغراض
1 ملعقة شاي بيكنغ باودر
1 ملعقة شاي ملح
2 كوب أو 4 اصابع زبدة غير مملح ، في درجة حرارة الغرفة
2 كوب سكر حبيبات
1 ملعقة صغيرة من الفانيليا
2 بيض كبير في درجة حرارة الغرفة
½ كوب من مسحوق الكاكاو غير المحلى
ينخل خمس اكواب من الدقيق والبيكنغ باودر والملح. يوضع جانبا.
اخفقي الزبدة والسكر معا حتى يصبح المزيج خفيف ورقيق.
اضيفي البيض ، واحده واحده و اخفقي، ثم اضيفي الفانيلا.
يضاف خليط الدقيق ويحرك بالملعقه الخشبيه ثم يعجن باليد
تقسم العجينة إلى نصفين.
يعجن الكاكاو مع جزء واحد من العجين. (إذا وجدت أن العجين صلبه قومي بإضافة بياض بيضه
اذا كان الجزء الابيض من العجين اضيفي له ثلث كوب من الدقيق
شكلي العجين بشكل مستطيل
لفي العجين ثم ضعيها في البراد لمدة 15 دقيقة على الأقل (يمكنك تركها طوال الليل)
افردي كل من عجين الشوكولا والفانيليا على شكل مستطيل بسمك 1 سم (تأكدي من القيام بذلك على سطح مرشوش بالطحين كي لا يلتصق العجين)
اقطعي كل مستطيل من النصف. (لفي نصف عجين الفانيليا ونصف عجين الشوكولاته ووضعيها من جديد في الثلاجة)
ادهني الجزء العلوي من عجين الشوكولاته بالماء أو البيض المخفوق.
ضعي النصف المتبقي من عجينة الفانيليا فوق عجين الشوكولاته
اقطعي المستطيل من النصف بالطول (ستحصلين على مستطيلين نفس طول المستطيل الموجود في الصورة أعلاه مع نصف العرض)
ادهنى اعلى احد المستطيلات ببياض البيض ثم ضعي المستطيل الأخر فوقه مع التأكد من عكس الألوان. وينبغي ترتيب الطبقات بحيث تكون الشوكولاته ثم الفانيليا ثم الشوكولاته ثم الفانيلا.
لفي مستطيل العجين المكون من4 طبقات في غلاف بلاستيكي ووضعيها في البراد لمدة 15 دقيقة على الأقل.
باستخدام سكين حادة جدا أو عجلة البيتزا قطعي المستطيل إلى شرائح الطبقات بعرض 1 سم. (انا استخدمت مسطره لانأكد انني اقطع بشكل مستقيم).
تعاملي مع الشرائح برقة ، ادهني احدى الشرائط ببياض البيض ثم ضعي شريحه اخلرى فوقها مع التأكد من عكس ترتيب الألوان.كرري ذلك مع شريحه اخرى او شريحتين
افردي العجين المتبقي في الثلاجه على ورق زبده او نايلون على شكل مستطيل (سيساعدك ترك العجين على حراره الغرفه مده 15 دقيقه قبل فردها)
ضعي الشرائح المرتبه فوق بعضها على المستطيل و بمساعده ورق الزبده او النايلون لفي مستطيل العجين المفرود حول طبقات الشرائح المرتبهو اضغطي للتتأكدي من عدم وجود اي فراغات
ضعيها في الثلاجه طوال الليل
في اليوم التالي سخني الفرن الى 180 C.
ضعي الرف في المنتصف
باستخدام سكين حادة جدا ،قطعي العجين شرائح سمك 1 سم
رتبيها متباعده على صينيه خبز مدهونه زيت
اخبزيه حوالي 12 دقيقة حتى يصبح ذهبيا في القاع. لا تخبزيه لفتره طويله و الا سيتم فقدان التباين بين لون الشوكولاته والفانيليا.
دعيه يبرد في الصينيه 15 دقيقه (لانه يكون هش جدا )ثم انقليه ليبرد على شبك
انا زاد معي بعض العجين فقمت بتقطيعه الى قطع صغيرة كورتها ثم ضغطت عليها باصبعي لتصبح كالبتلات
و شكلته وردات

